Garlic and Herb Brioche Bread
I have a confession to make. I made this bread weeks ago. Like the day before Easter weeks ago. I held off on sharing because the energy it takes to put together a blog post had left me. Self-isolation has not been terrible but has not been easy either. I have the privilege of continuing to work during this time. I am creating thousands of pints of non-dairy ice cream for my community. So between work and trying to process our new normal my blogging skills have been lacking.
But the recipe was patient with me. Waiting for me to pick it back up and share it with all you. The bread was a hopeful reminder of the spring that seemed too far off. Snow was flying for the first half of April and the ground was barren and hard. I saw new life beginning to emerge in the buds of magnolia trees and the green leaves of tulips. But Spring seemed like a promise that was unlikely to be fulfilled.
Now its May, I can go outside without my winter jacket (today at least). And this brioche has become a celebration of spring. A celebration f fresh greens, herbs and garlic that are popping up in farmers’ markets and gardens. I’ve always been a huge fan of fresh herbs, most of my savory recipes contain at least a few sprigs of parsley or thyme.
Brioche, if you’re not familiar, is traditionally not so plant-based friendly. The only liquid in the recipe comes from eggs and so much butter it could make your heart stop watching all it go in. But brioche is also one of my favorite doughs to work with because once you incorporate all the fat it transforms. The dough gets a beautiful sheen and it gets smooth and supple. The finished bread is rich, and light. Perfect slathered with a heavy helping of jam.
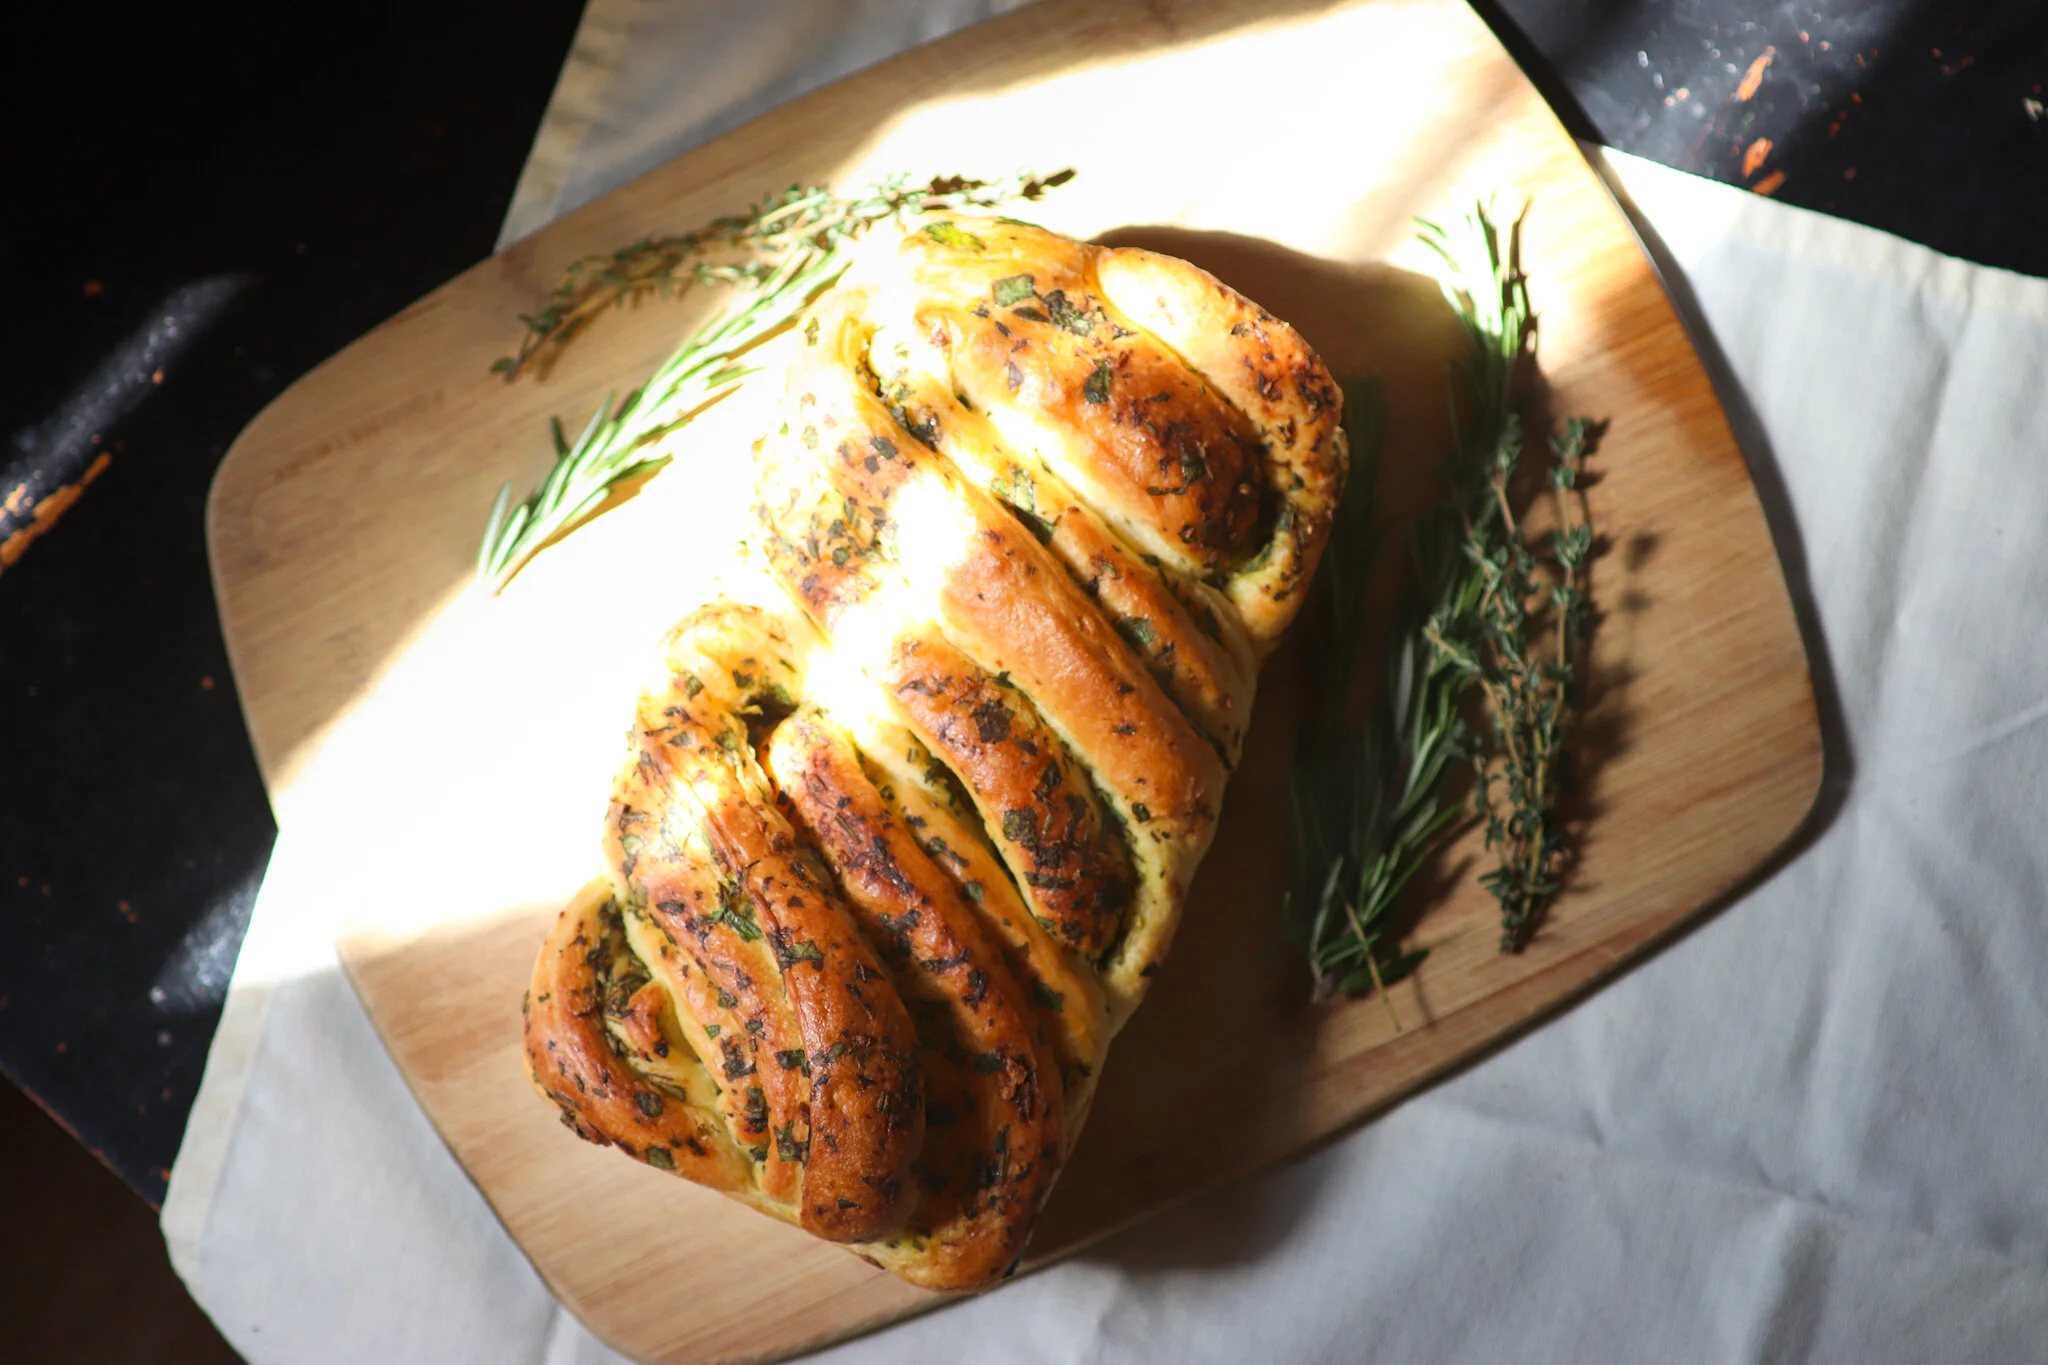
What makes this brioche a Spring treat is the healthy addition of garlic, parsley, thyme, rosemary, and olive oil. Braided into the loaf to make perfect, vibrant green swirls. I also add turmeric powder to the brioche dough because the yolks in a traditional brioche recipe do give the crumb a gorgeous and rich yellow tinge. The color of the sun mixed with all the green of spring. But the turmeric is optional is purely there for color.
I also use this cool braid effect to make the bread look extra special. But this step is completely optional and you can make a beautiful bread without it. You can just roll the dough out into a huge square, spread the herb and garlic paste all over the dough and roll it up like you would a cinnamon roll. Then you would pop the bread into a loaf pan and proof and bake as instructed.

Serve this brioche with a big pot of white beans, or alongside a spring feast. Or make this brioche your spring feast, there would be no shame in that at all. You can make any leftovers into a savory French toast or bread pudding. Or slice the brioche to freeze it and enjoy the richness one slice at a time.


Garlic and Herbe Brioche Braid

Ali Lawrence | 5/6/20
- prep time active: 1 hour
- Prep time inactive: 1.5 days
- cook time: 40 minutes
Servings: 1 9X5 loaf (between 8 to 10 slices)
Ingredients:
For the Dough
- ½ cup non-dairy milk, room temperature (I used soy milk)
- ¾ up aquafaba
- 1 cup all purpose flour
- 1 ¾ cup bread flour
- 2 ¼ tsp active dried yeast
- ¼ tsp salt
- ¼ tsp turmeric
- ¾ cup (or 1/5 sticks) non-dairy butter of choice, softened
For the Garlic and Herb Paste
- ½ bunch of parsley
- 3 sprigs or rosemary
- 10 sprigs of thyme
- 3 garlic cloves
- ¼ cup olive oil
- ½ tsp kosher salt
Instructions:
For the Dough:
- Combine the non-dairy milk, aquafaba, flour, yeast, salt and turmeric together into the bowl of a stand mixer with a dough hook attachment. (You really want to use a stand mixer for this, there is a lot of kneading and doing brioche by hand is no fun.)
- Mix together all the ingredients until just combined on low speed. Then crank up the speed to medium high and knew for about 5 to 7 minutes until the dough comes together into one big mass and is no longer sticking to the sides. Making sure that you’ve developed enough gluten by doing a windowpane test. This is done by taking a small piece of the dough and stretching it thinly so you can see the light through it without tearing the dough.
- Once you’ve kneaded the dough long enough you are going to start adding the butter a little bit at a time. With the mixer on low, begin adding a bit of butter and mix until its entirely incorporated before adding another piece of butter. Continue until all the butter is incorporated and the dough is smooth, shiny and stretchy.
- Form the dough into a ball and place it into an oiled bowl and let rise until double in size (about 60 to 90 minutes). At this point you are going to gently deflate the dough, shape it once more into all and put it in the fridge overnight. This is to allow the butter to set up and the dough to relax. The longer fermentation also helps build flavor.
For the Paste:
- In a food processor or blender, combine all the ingredients until combined but still slightly chunky.
- Alternatively, chop all the herbs and garlic finely on a cutting board or with a mortar and pestle. Place into a bowl and add the olive oil and salt, stirring to combine.
For the shaping, proofing and baking:
- On a floured work surface begin by tipping out the dough and shaping it into a rough rectangle. Then with a rolling pin, roll out the dough into a large rectangle that is about ¼ of an inch thick. Make sure the width of your dough is as wide as the loaf pan you’re planning on baking the bread in.
- Spread the herb paste all over the dough, being sure to leave about ½ inch at the top of your dough to seal the roll.
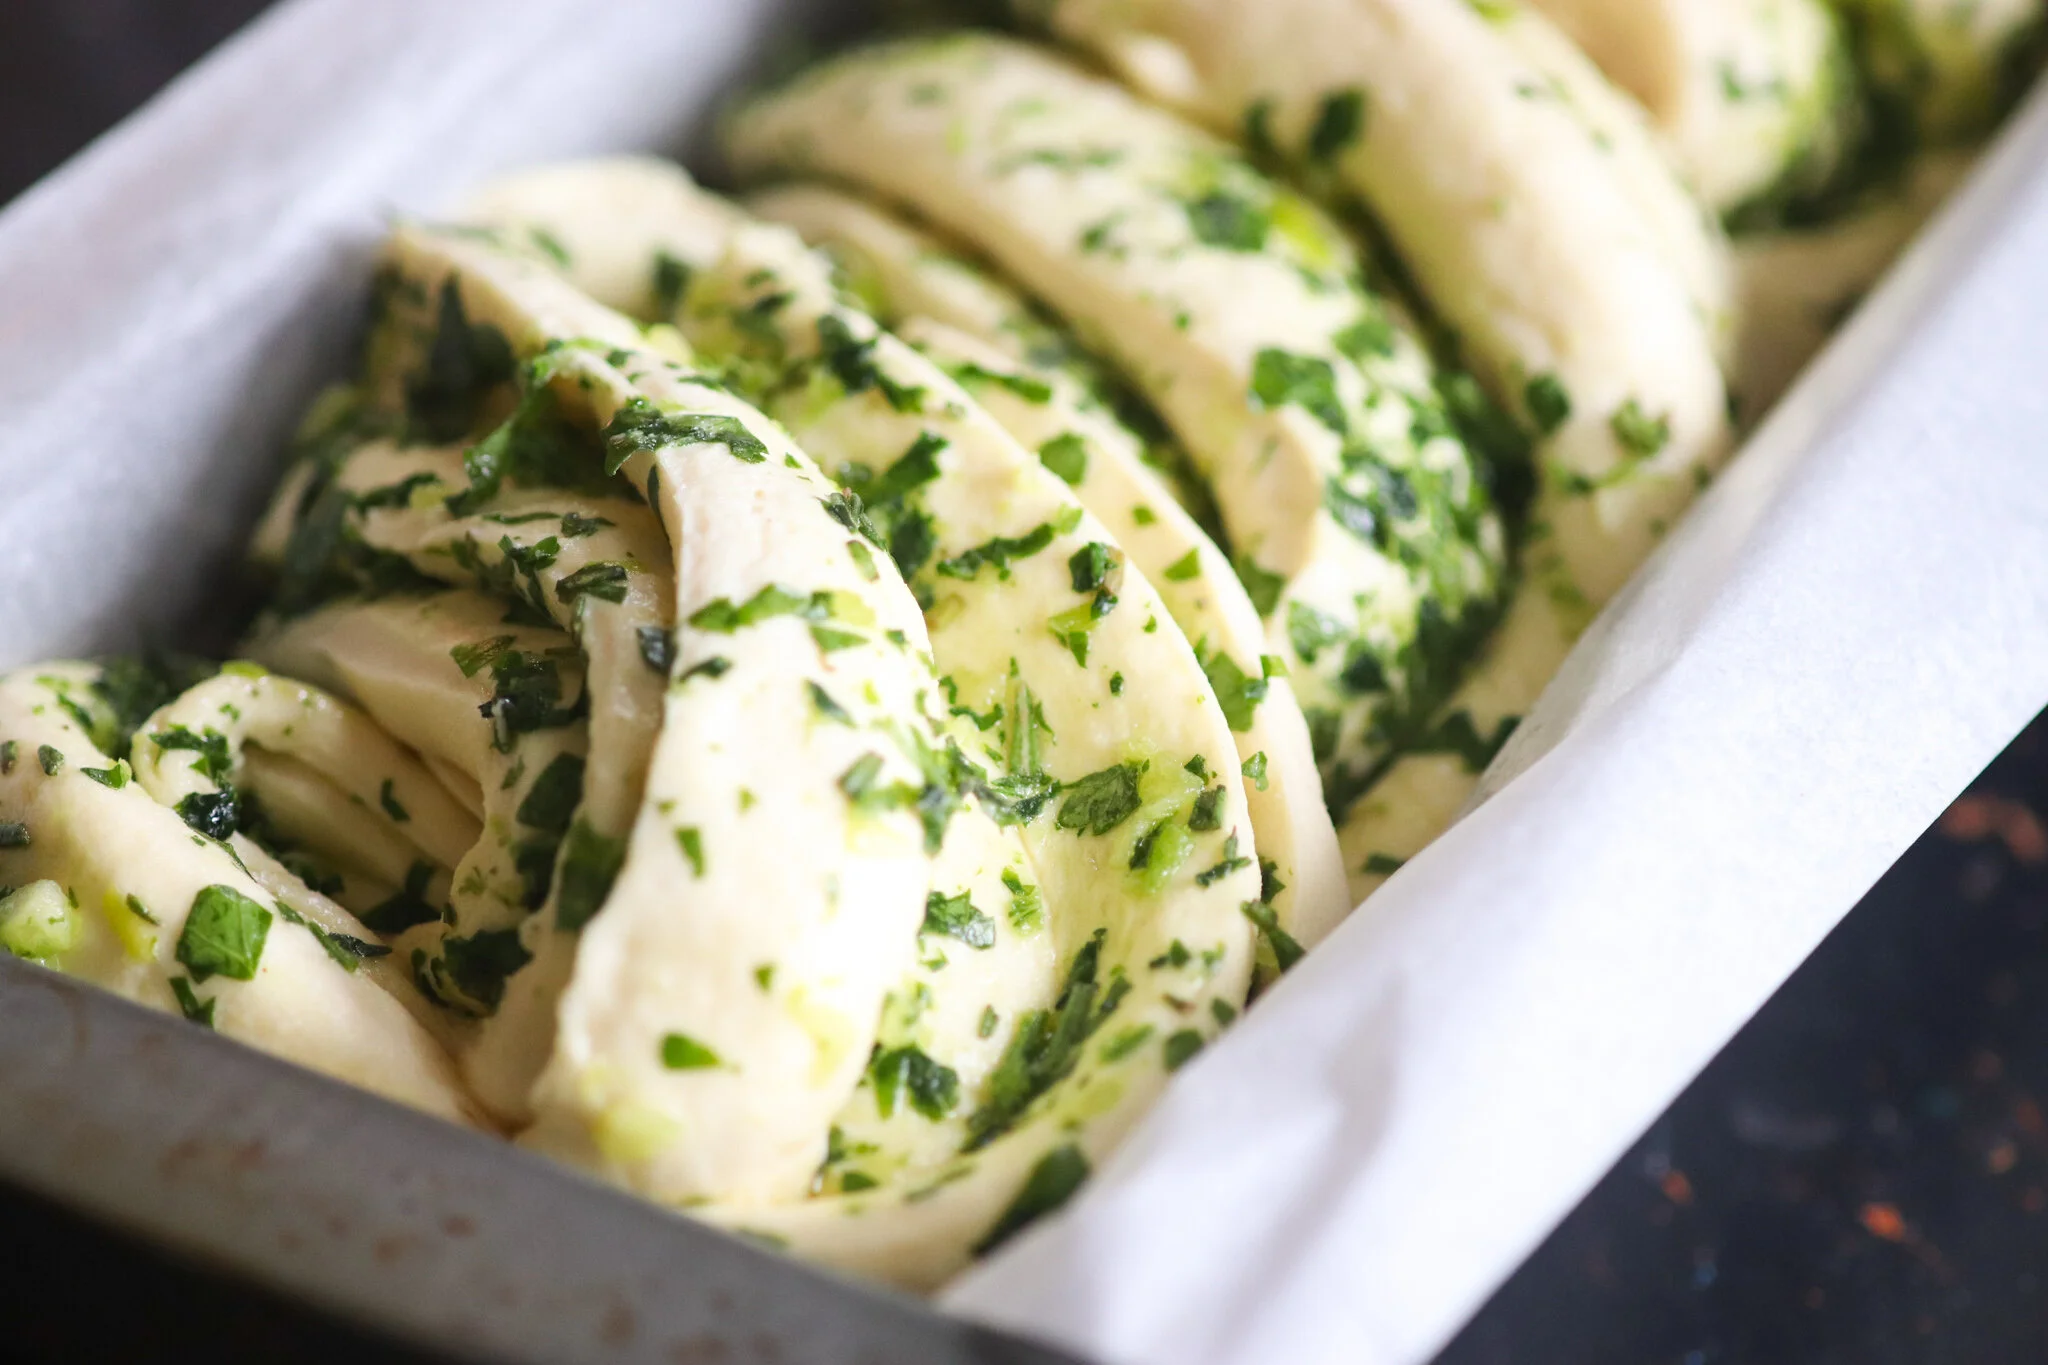
- Roll the dough up like you would a cinnamon roll, creating beautiful green swirls. Once you reached the end, pinch the seams together, or gently pull the roll towards you seam side down to seal. You can stop here if you’d like and skip to step 6.
- To make a braid, cut the dough in half lengthwise, but not all the way through, leaving a bit at the end connected.
- Then to braid, just place one piece of dough, cut side up on top of the other. Twist until you’ve reached the end of the dough. Pinch the end together. Make sure the braid isn’t too tight or it will have a difficult time rising.
- Place in a greased loaf tin (9x5) and proof (let rest) until the braid is just coming over the top. (about 60 minutes). At this point, preheat your oven to 375 degrees.
- If you want to add a shine to the top of your loaf mix a little bit of non-dairy milk with a pinch of turmeric until combined and brush gently on top of the loaf after proofing but before baking.
- Bake in the oven for 30 to 45 minutes. You want to make sure the loaf measures around 225 degrees. There is a lot of fat in this dough and if the bread is under baked, after removing from the pan it will start to sink into itself slightly.
- Once the loaf is done baking wait until the loaf is completely cool to remove from the pan to enjoy.
- Enjoy this loaf for up to three days stored at room temperature, or slice and freeze to enjoy when you like.